Wednesday, October 5, 2011

A Classic Fall Menu Favorite: Beef Stew

My husband grew up on a farm. I grew up a military kid. He adores meat and potatoes. So do I. He's not an international cuisine fanatic. {He tolerates it for my benefit. I think that's really sweet of him...} I am a semi-adventurous eater. To blend and compromise our flavor palettes, I get to sneak in some of my favorite things into some of his favorites from time to time and it makes me chuckle when he LOVES the outcome.

We've switched to eating as much organic food as possible into our diets. I'm pretty certain we will never go all the way back. Today's menu choice is a classic favorite all over the world (with the exception of a few places like, say, India): beef stew. I have always --since I began cooking in earnest-- made it in the Fall, and have always been swept away with delight at the outcome. Here's how I did it this time. {I tweak my recipes almost every time I cook something from scratch.} This particular recipe will fill a very large {more than 10 quarts} pot if you keep adding volume for the ingredients. This recipe is enough to feed a family of 7 with varied appetites. You might even have leftovers. That depends entirely on how many hungry children are at the table.

The first step is to pour 1-2 tablespoons of extra virgin olive oil in the bottom of the hot pot and throw in a 1/4 teaspoon of paprika along with about 5-6 medium chopped celery stalks. {Don't forget to wash your veggies first.} Gently salt your celery. {A literal pinch.}

I had two crowns of broccoli that I wanted to use just florets on their own as a side for another dish, but I hate wasting food, so I sliced the stems very thinly along with 7 medium (or 4 large) carrots.  Broccoli stems are packed with so many vitamins, it's kind of a sin to throw them away.
Once the carrots and broccoli stems are in the pot, sprinkle them with salt. Let them simmer for several minutes {5-10 depending on how finely they've been chopped} before adding 32 ounces of beef broth. I really enjoy hearty vegetable stews with decent sized chunks, no need to be overly precise about how small you chop. Broccoli stems add a depth of flavor in this dish without screaming to your angst ridden children, "You're eating broccoli!! Pbpbpbpbpbt!"

Season 2 pounds of beef tips with salt and pepper generously. Oh my stars. If you want to cut the stew beef into bite sized chunks, I won't stop ya', but I just used them the way I got them from the butcher. Holy. Moses. The great thing? I got two pounds of fantastic quality meat for less than $9. Have I mentioned that stew is a great way to stretch a buck?

Once seasoned, put that delicious meat in your pot. You'll want this to simmer on medium while you chop some parsley and add other spices.

I chopped about a cup for the stew.
Can you use dried parsley? Certainly. Will it taste the same? Not really. Close, but no cigar. There is no substitute for fresh ingredients. Ever. {hopping off of my soap box now}

Doesn't this already look promising?

You'll hear me say, "Sprinkle [insert ingredient here] over the entire layer of the pot," a lot. This is what I mean. {This is a good way to season regardless of the size of your pot. You will always have just the right ratio if you learn this technique.} I used garlic powder (not salt) and sprinkled just a touch over the surface of the broth/meat/veggies. If I'd wanted the garlic to be more of a pronounced flavor, I would have used minced garlic along with the other vegetables as they saute. Since, I was going for subtlety, I used garlic powder. Next... the flavor explodes. If you are a lover of spicy {warm to hot} food, this is where you'll add cayenne pepper. I sprinkled just a dash in at this point. Feel free to add a teaspoon or more if you like. Also, if you are so inclined, this would be the ideal place to add scotch bonnets or jalapeno. I am not prone to that particular proclivity, but I won't judge y'all who are. ;)
Hello, smoked paprika. I have loved getting to know the grown up organic version of you so very much lately. Come join the party in my pot. {Use about a teaspoon. Maybe a smidge more.}
Stir it all up. Oh, my heavens. It already smells good.
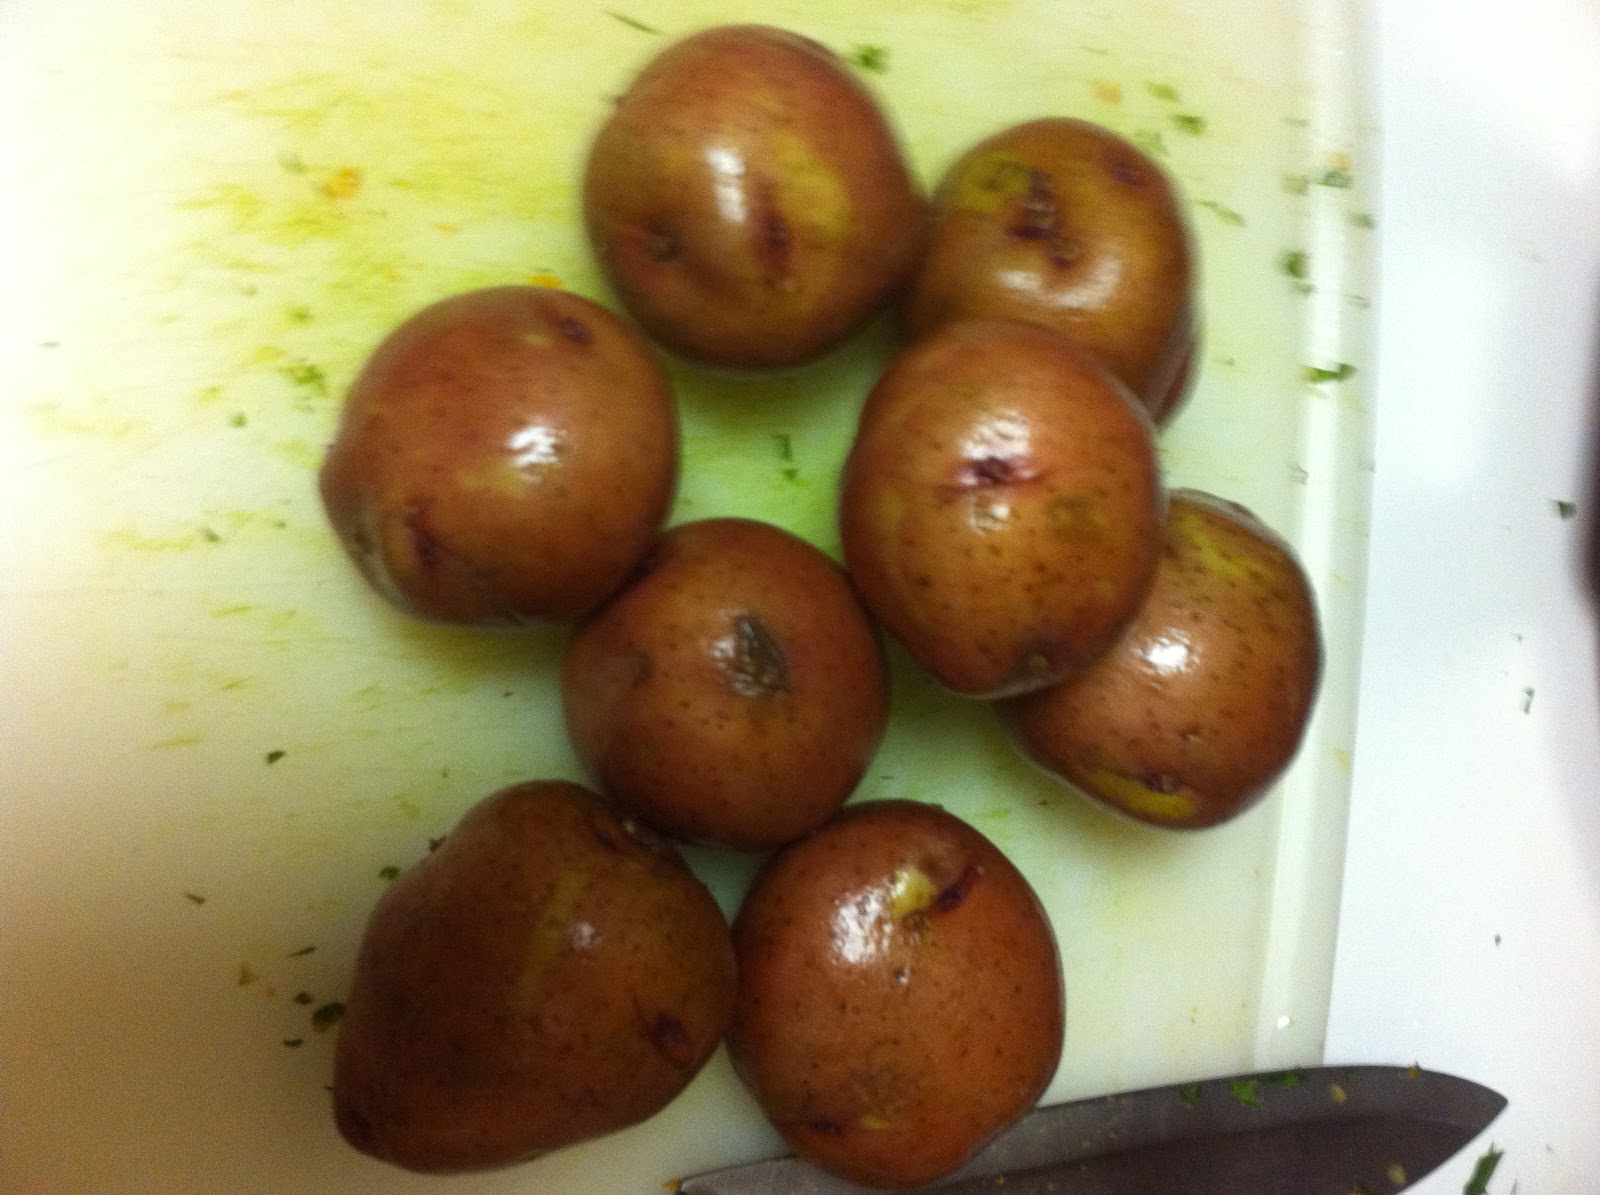
Quarter 8 medium red potatoes after you wash them well. Soup is not a place to eat dirt, y'all. Trust me on that. I won't tell you how I know this. Just. Trust. Me.
Can you stand it? I'm losing my mind from the delicious smell. It's only about to get better, my friends. Okay, now...


THIS particular wine is a truly delicious one to drink with steak or hearty stew. It's also not the cheapest wine out there. However, I love this vineyard for cooking purposes. The vines truly are old and produce a SPECTACULAR product for cooking or drinking {if you like a glass of wine}. Zinfandel is usually a spicier wine, more robust and stout than the fruitier tasting wines. These vines were transferred to California "from the old country" and have seriously old roots. I'm a fan of vintage anything, so if you've never tried this one and you're a big, bold red fan, you should give it a shot. I won't judge you either way. I used about 1 1/2 cups and then set the soup to medium for 2 hours, put the lid on and walked away. You can certainly leave out the wine if you are opposed to it. I used to be, but began cooking with it to see what the hype was about. It truly does deepen the flavor of food as it cooks.
After 2 hours of simmering, I came back {turn off the burner} and stirred in 1 cup of frozen {organic} green beans and 2 cups of frozen {organic} corn. After about 5 minutes of sitting, the textures are perfect, not overly cooked, not mushy. Just full of vitamins and wonderfully warm flavor. This is how the end product looks. I promise, even if you're not a huge soup fan, this one will make you happy. It's SO MUCH BETTER than canned food. You'll never want to eat from a can again!

You'll notice, there's very little fat in this recipe. You CAN add 2-4 tablespoons of butter as you saute the veggies, and it's DIVINE when you do, but I am keeping myself to a lower fat version of everything these days. Serve this with french or sourdough bread if you like and get ready for your power nap.

Friday, September 9, 2011

Basic Design 101: Lessons in Scale & Placement

A lot of people love to redecorate their homes. Some even have really exquisite taste. Even those with great taste can make simple mistakes, though.

When you begin a decorating project, think of all of the things the room has to do to function. In a bedroom, we rest, we dress, and sometimes we play or read. The room needs to function accordingly. The first cardinal rule of function is scaling appropriately. If you must have a king sized bed, make sure that your accompanying room is big enough to pull it off. There's nothing more uncomfortable than a bedroom with no room to move. Also, make sure that you don't have dressers or night stands that are too short or small for the bed. Some people read and unwind with a beverage in their rooms before they doze off. If your night table or night stand is more than a couple of inches shorter than the height of the bed, you'd find yourself getting up and UN-relaxing to put a book or glass down.

Scale! Scale! Scale!
Here's an example of scale gone awry in two rooms with great elements...
 Julia Child is a GREAT element in any room. Notice how the scale of these kitchen counters and stove just don't really work. It's kind of obvious, right? She was a trooper, wasn't she? Love her. Next is a photo used in Southern Living magazine with more subtle scale errors.

There was a professional designer involved. It's a beautiful room. Lovely headboard. The color scheme is monochromatic gold. GREAT concept. The night stand nearest the window: perfect size. The drapes: perfect length. The bed is scaled appropriately to the room size. GREAT! Just a few things miss the mark with scale, but it is enough to make the eye a bit unfocused or uncomfortable. The chair by the window? First of all, it doesn't allow for the night stand to open if there's a drawer or be seen and it looks like a nice piece of furniture with nice lines. Secondly, the chair, though it is lovely, is too short and looks dwarfed by the bed.  Placing it even in a pair somewhere else in the room wouldn't work because the scale of the chair, it's height and width, are just not right in a room with THIS large of a bed and ceiling height. Putting a bench at the foot of the bed would work better in this space, or putting a chaise or settee or couch elsewhere. The skirted table has a really awesome potential. It's height is right, but it's scale RIGHT next to the bed is off-putting. It should be a bit more substantial next to this magnificent headboard. There are other things wrong with this design, but we'll revisit that later.  Let's visit a room that is right as rain.
Here is a room found in Cottage Living. This is not a huge room. The designer paid attention to where the traffic patterns were in the room and left an appropriate space for paths. (Which is cardinal rule #2. The official rule is to leave 36 inches -3 feet- for walkways that lead to or away from doors and 18 inches between furniture pieces to pass through like a couch and coffee table.) The bed is sized and placed appropriately and there is space for the room to function as a dressing area and a reading haven. There's even storage in the wicker trunk at the foot of the bed. The major functions of the room are addressed perfectly. The scale of every single lamp, chair, accessory in this room are spot on. This is why, even if you don't like wicker or white rooms, even though there are a lot of things out, you'll be able to look at this photo and feel somewhat relaxed. It's all about scale. 

Let's look at another room and see what we can learn from it.
Veranda magazine published this gorgeous room. It is a fairly large room with high ceilings. Normally two twin beds could be easily dwarfed in a room this large. The designer was brilliant and chose to extend the bed with benches the perfect width of each bed. Drawing the eye further outward and upward with the benches and the cornice canopy over each was the crowning achievement for making this room successful.  There are lessons we can and will learn from this room about light and color and contrast another time.

Coastal Living published this photo, and the room is successful for a variety of reasons. Look at the furniture pieces in the room and note how appropriate their size is to one another. Can you see it? Even for a girl who really doesn't enjoy white as a predominant color choice, this room makes me happy.

Have you ever struggled with scale and not realized it? Tell me about your successes with scale and placement. I want to hear from you about this topic!

Wednesday, September 7, 2011

Embrace Southern Chicken & Dumplins And They'll Hug You Back!


My name is Deborah and I love to cook. I've been blessed to have a few dear friends and family members who were patient enough to teach me how to cook. Let me preface that by saying that when I was 20 years old and a brand new wife, I could read recipes and feed myself and my husband with a minimum degree of success about 50% of the time. {That means, we ate, but it wasn't really good most of the time. Unless I baked. One can live on cookies and cake, right?} I could make breakfast and anything a la box food, and whatever I had a simple recipe for. We ate tuna casserole so much that I vowed never to cook that again.  {Not that there's anything WRONG with that, per se.} Nineteen years, four kids, a divorce and remarriage later--not necessarily in that order, I finally have accrued a nice bit of skill in the kitchen, for which cooking television and very patient friends are at least 80% responsible.

Anyhow, Monday, I had a date with destiny. I prayed to the cooking gods, begging for the guidance of my sweet grandma and my dearest departed friend, and held my breath {but only for a few minutes--passing out is no fun} and attempted for the very first time an old Southern standard: chicken and dumplins. {That's how we say it in the South. Yes, I know most people say dumpLING. Bless their hearts.} I am almost 40 years old. I have missed my grandmother's chicken and dumplins for 27 years. Twenty-seven years is far too long to fear a recipe, of all things. Truly, in my mind, it wasn't just a recipe. It was the nostalgia of the woman who has inspired me for most of my life, who could cook Southern comfort food in her sleep if she'd wanted to do so. It was my intense desire to honor her and do due diligence to her legacy. It was time for me to be a Brave Girl about it all. Thank you, Grandma. I love you!

We just endured our first hurricane watch as a family recently, and the weather has been rainy and cool since. After a surprisingly strong, but not epic, earthquake followed by a hurricane {which, for us, was really a tropical storm}, I made the executive decision to make comfort food instead of traditional Labor Day picnic fare. I dove right in and began my lessons in the art of making dumplins, but I was completely intimidated.  "It's just flour and milk!" you say, "What's so difficult about that?" You must understand that NO one messes with the hallowed favorite recipes from their grandmother's kitchen. I just didn't want to mess it up. Also, I never actually was given her recipe. So, I went about an internet search and found a photo that looked like hers did and tweaked the basic instructions attached. It took me at least 10 years to learn how to make my own chicken stock. Well, in truth, it didn't take me that long to learn it, but it certainly took me that long to WANT to learn. I feel as if a rite of passage has just transpired in my life. It's exhilarating and humbling all at once.

 Here's how I went about the process. I probably should've begun with a few minutes of Yoga, because I was so ridiculously nervous about it all. But my first move was to gather my ingredients for the stock. Those who aren't new to cooking already know that when you cook with incredibly fresh and unprocessed ingredients, your food is like magic. It took me years to figure this out. Trust me on this one, it's true.


Stock isn't difficult, really. Making good stock is really all about how well you season the ingredients before you cook them and making sure that your heat is never higher than medium [a low simmer]. My not so secret weapon is that I never just use water to cover the meat and veggies. I always, always use a pre-made broth. It just makes life easier and the recipe that much more flavorful.

antibiotic free organic chicken
Alright, now that we've gathered the ingredients, grab a really large stock pot and add 4 roughly chopped large carrots and celery stalks. I cut them in thirds. Typically, this amount of vegetables nearly covers the bottom layer of the pot. Sprinkle the veggies evenly with salt and pepper. Add your cut chicken pieces to the pan after you've salted and peppered both sides of each piece generously. Your chicken should look like you evenly sprinkled every surface. You can buy a whole bird and cut it yourself, or ask the butcher to cut it for you. OR if you don't have a real butcher in your grocery store (sad reality, but true in many places), you can find a pre-cut whole bird and just skip right out to your car. Just be careful not to drop your chicken. That would be bad. **This is the part of the story where my brain remembers hearing stories of my grandmother wringing the neck and decapitating her chickens before she plucked and butchered them herself. I'm so proud of her for having that level of ferocious skill, but I'm so glad I do not have to go to those lengths today.

This is the point that most stock recipes will tell you to cover with water. This is where I use three 32 ounce organic boxes of broth and cover the pot with its lid.  It is okay to walk away for a couple of hours while your chicken stock simmers. The chicken is beginning to fall off the bone when you fork test [fork test- poke with fork. very technical term.] between an hour and a half to two hours of cooking. (If you're cooking on a gas stove, it may not take quite that long.)

When you see particularly the breast bone gently pulling away from the meat, it is time to turn off the burner and use a colander and large bowl to strain the broth from the meat and veggies.  Once you strain the broth out, put it back in the pot and adjust your heat to low while you mix the dumplin batter. Taste the broth to check for seasoning. It should be a bit saltier than the end product. If it isn't salty enough, add more by 1/2 a teaspoon until it tastes like you want it. During this time, your chicken needs to cool so that you can handle it later to discard the skin and bones.

For the dumplins, my ingredients were flour and milk. That's all. No leavening was used this time. I've seen recipes with salt. I've seen recipes with baking soda. Not this one. Not this time. Two cups of all-purpose flour (I feel really sorry for you gluten-free folks. I don't know if there is a way to make this recipe without gluten.) along with 2/3 of a cup of milk and just a splash more. Mix these together until a single ball forms. It will be sticky, so as you remove the dough, make sure you have sprinkled a bit of flour on your hands and on the dough. I like to roll the dough about in the mixing bowl coating it with a bit of flour before I take it out.

I have no idea why I use Gold Medal flour, but I always have, except for one time I tried another brand and just twitched the entire time. Use your favorite. Whatever helps you relax, really.  Also, I'm particular about milk. Some milk just ain't good, y'all. This stuff, however, rocks my world. I've accepted the fact that I'm a little discriminating about food products.
Your dough should look like this. I typically lay out wax paper or parchment (whatever I have on hand) and sprinkle some flour on that before I plop the dough down to roll it out. It's a good idea to walk away for about 5 minutes and let the gluten in the dough relax so your dumplins will be tender. Turn the heat of your stock up to medium and get a small rolling boil working. Knead the dough a couple of times to loosen it up. Then put it back into a ball and get ready to roll it out. Don't forget to rub flour on your rolling pin so it doesn't stick. Once your dough is rolled out, it should be 1/8 inch. How many people measure dough thickness with a ruler? Not me, but it can be done if you feel particularly precise. It should look like THIN pizza dough when it's ready to cut. Use a pizza cutter or sharp knife to cut 1/4 inch wide strips. Dumplins should be no longer than your index finger. If they're too long or wide, they take much longer to cook and become tender. Cook time will depend entirely on how many dumplins you cook. I did a double batch and it took them about 30-40 minutes. When they are done, the ends should be slightly translucent. Mine weren't translucent because I didn't quite roll them thin enough, but they were still really delicious. When you determine your dumplins are finished cooking, sprinkle a tablespoon of flour and 1/3 cup of milk into the pot and stir. You'll see your stock turn into more of a gravy or light sauce.

While your dumplins cook, you should begin to remove the bone and skin and connective tissue from the chicken. Take your time doing this step so the texture of the chicken remains moist and not mushy. A lot of people nowadays don't know how to debone a bird. It's time consuming, but the more you practice, the faster it will go. Be sure that the meat you separate out is just that and tear it apart into just larger than bite-sized chunks. When your noodles are almost ready, put the chicken back in the pot and stir gently. Here's how mine looked. The dumplins should be fairly limp and lazy looking. Mine are just a tad too thick for that, but Oh. My. Heavens. So very good. I challenge you all to make this dish. Some of you will probably do it FAR better than I did, but for a first attempt, I was quite pleased. What a great way to kick off Autumn! Good luck and be brave!

**EDIT: I totally forgot to mention something sorta pivotal. I used a Kitchenaid Stand Mixer to make the dough. It can be done with a wooden spoon and your arm, but it takes a lot longer. Anyway. I'm a thorough girl and hate leaving out steps. Recipes with missing steps can result in disaster.